Busy day. Bedliner for the tubs, heatshielding for the footboxes and an original style throttle pedalThe stock Hurricane kit comes with a Lokar cable type throttle linkage and pedal. For those wanting to just build a car, it works well and is a quality item. But I am on this “Period correct” kick.
I used my friendly Google search and a lot of review of photos on ClubCobra and CSXInfo to determine how to construct an original appearing throttle linkage and footbox bracket. With photo’s in hand and some reverse engineering, I made up my footbox bracket and throttle pedal. But when I was all done and fitted it to the box, I realized the Hurricane footbox is not identical to the original cars. The top of the box has been raised about 2-4″ for the overhead swinging pedals. The originals had the master cylinders at the bottom of the footbox. The bracket fit fine but the throttle pedal was 4″ too high. I thought I’d just modify the pedal but as I worked on the linkages, I figured out this wasn’t going to work – so it was back to the drawing boards.On the original cars, the cross shaft for the throttle pedal runs over the top of the steering shaft. I used a little poetic license and designed a similar footbox bracket but had the cross-shaft go under the steering shaft. I tweaked it as much as I could, I wanted the throttle shaft as high as possible, but needed some amount of operating clearance for the steering. My first attempt required the bracket again be modified. With the bracket in place, the “D” shaft for the steering wouldn’t rotate. The “D” side would clear, the outer side wouldn’t. Cut, Grind, Bend, Hammer, Re-Weld. I finally got it to do what it is supposed to.
I’ve generated a set of drawings of the parts I made for my build. Feel free to use them. Throttle Pedal drawingsMore pictures of the finished linkage. Connection to single or dual four barrel will require shorter main link
 |  |  |
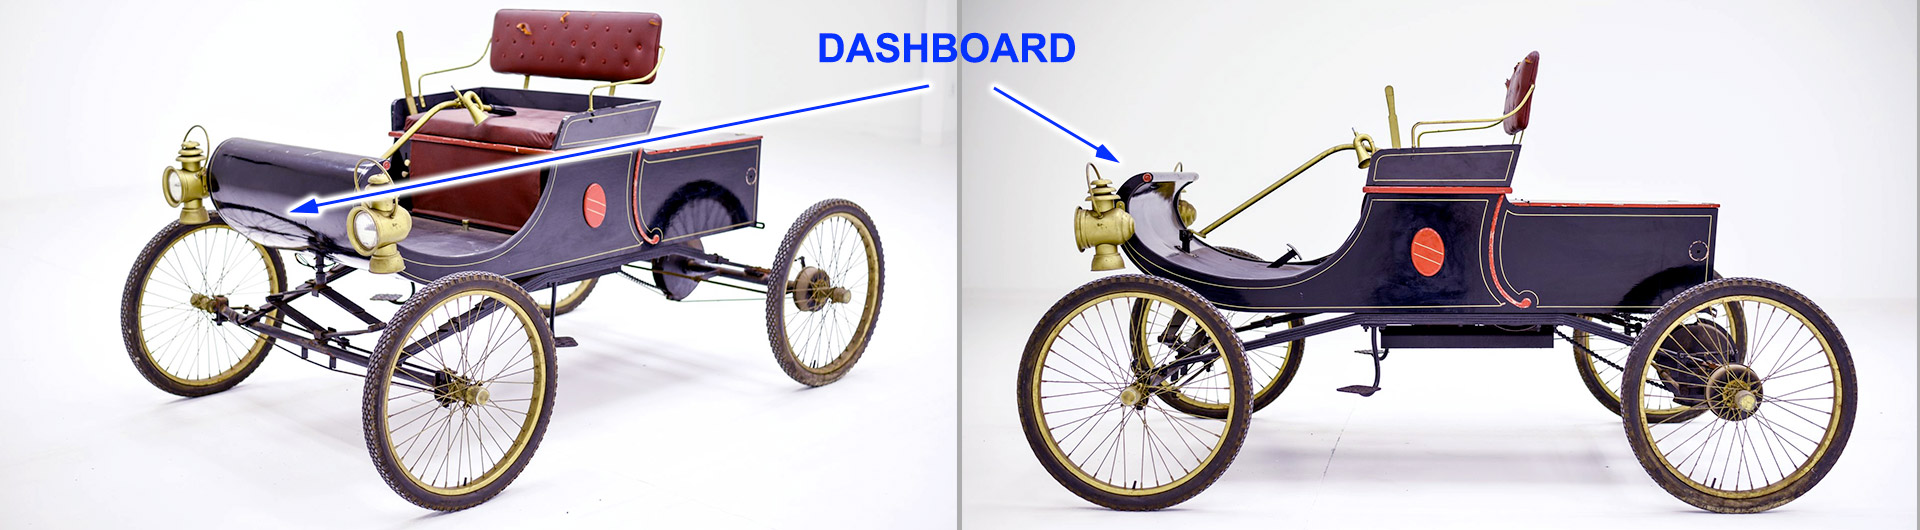
| Original Throttle Pedal and Footbox bracket | Kirkham Footbox and throttle bracket | Original Pedal setup |
 |  |  |
| Lokar throttle pedal, as supplied with kit | Hurricane Footbox, exterior | Standard Hurricane Pedal setup |
 |  |  |
| My first build. Looked good but . . . | On the inside, you can see the problem. You really need a long foot to use this pedal. | Flat Pattern, before forming and welding |
 |  |  |
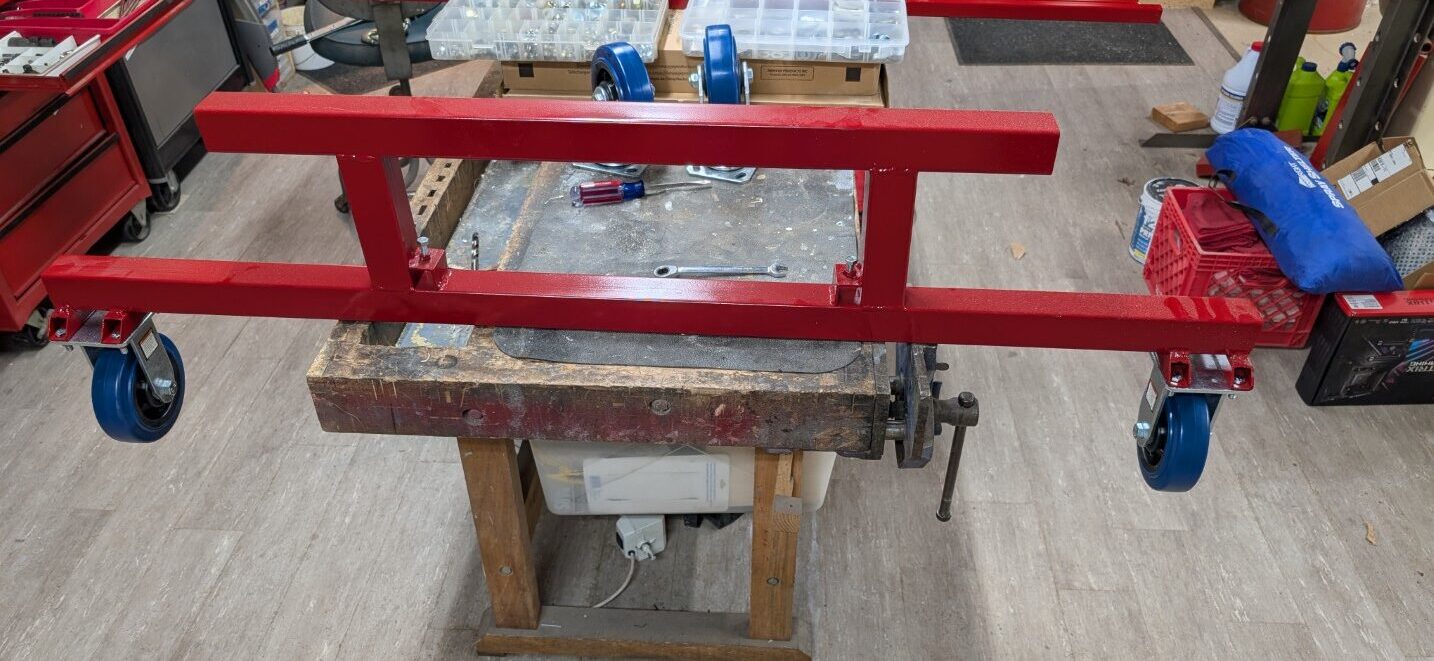
| Final build. Looking good | Pedals on the inside. I think I’m going to like this | Final hookup of the finished linkage. Note slight bend in throttle arm to “adjust” clearance. |
 | |  |
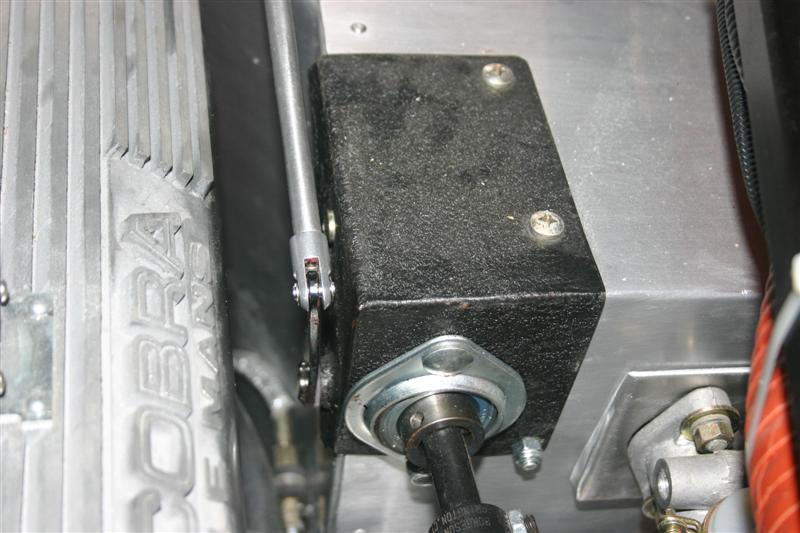
| View of footbox throttle bracket. I originally used a small heim joint for the connection to the lever but there isn’t much clearance between valve cover and footbox. The piece used here is a Lokar cable end, threaded into the rod and staked so it can’t come off. Clevis uses small rod with snap rings. | Another angle on the footbox bracket | View of the assembled linkage. On dual fours, the cross shaft goes between the two carburetors. This is a tri-power setup, the cross rod is at the forward end. |
 |  |  |
| View of the cross shaft and spring setup to allow motor movement. Levers were formed from .090 aluminum | View looking across the carburetors | View from front end |